Start with the basics.
- Get step-by-step instructions for wrapping a present like a pro.
- Learn how stylists make tissue paper in gift bags picture-perfect.
16 Stylish Gift-Wrapping Ideas for Perfect Presents
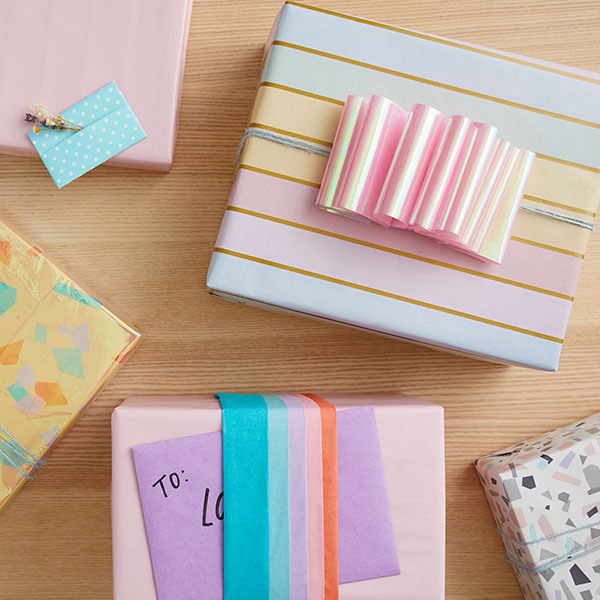
Did you know “dress to impress” applies to presents, too? Different events (and people, of course) might inspire different approaches, from simple and stylish to fancy and festive. With a few easy gift-wrapping techniques and ideas, you can dress your present perfectly for any event.

Choose wide satin ribbon in a colour that complements the wrapping paper or keep rolls of neutral black and white on hand. Learn how to make a simple bow.
Add a sprig of greenery to a wrapped gift card or tape a single stem from your garden to the top of a box. Try washi tape for smaller pieces of greenery or colourful masking tape for bulkier blooms.
- For a tidy look, start with two or three sheets of tissue paper in colours that complement the gift bag.
- Fold them in half lengthwise.
- If the sheets have designed or scalloped sides, bring those edges together.
- Start at one end and fanfold the paper, then staple the bottom together.
- Drop into your gift bag and gently separate and fluff the top.
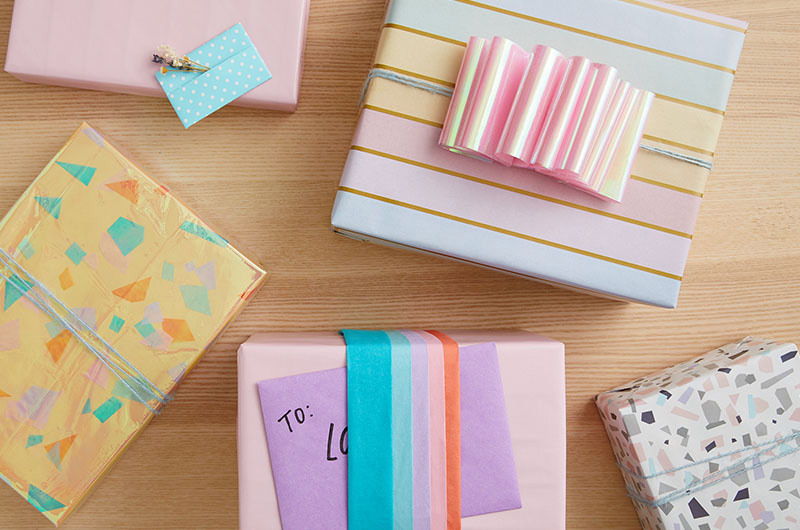
- Cut a strip of tissue, reversible gift wrap or ribbon a few inches wide and at least a foot long.
- Starting at one end, make even loops along the length of the paper, holding the bottom together in one hand. (Be careful not to crease the tops of the loops.)
- Still holding the bottom, punch a hole in the centre and thread the topper onto a ribbon long enough to go around your gift, plus a few inches.
- Tie the ribbon around your gift, trim the ends and gently separate the loops to cover the knot.
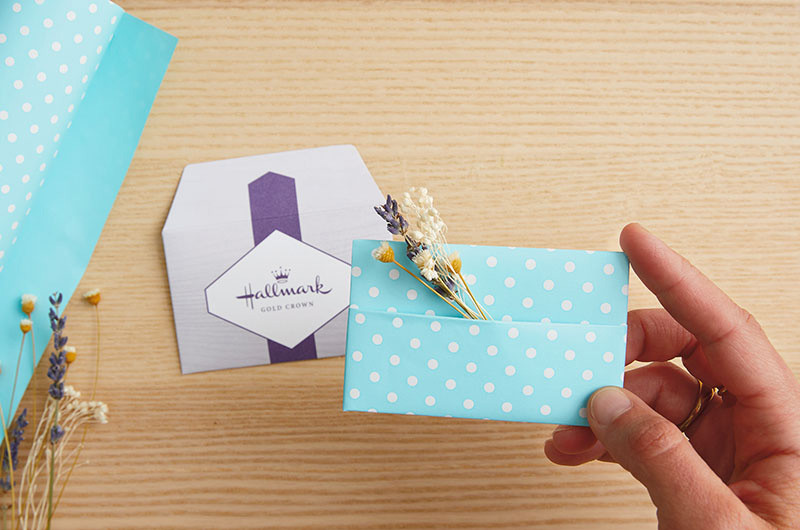
Take advantage of reversible wrapping paper and craft an envelope for your card to complement the gift. It’s easy: Gently pull the card envelope apart, trace it on to the wrapping paper and cut it out. Then follow the original to fold and glue your new envelope.
Get step-by-step directions for creating a woven design. All you need is a wrapped gift, tape and ribbon in a couple of different hues (and widths, if you’d like). Bonus: because there’s no bow to crush, it’s easy to ship.
Always appropriate: Include a card.
A greeting card is the perfect accessory for any occasion—and there are lots of ways to attach one to your gift:
- Wrap your gift with a built-in pocket for a card.
- Slide under a sassy sash.
- Create a band for the box with a built-in card pocket.
- Attach with double-stick poster tape. (It won’t tear the envelope.)
- Make it easy with a gift bag featuring a built-in card pocket.
Go with the present equivalent of pageant hair with a tissue paper flower in any size or colour you like.
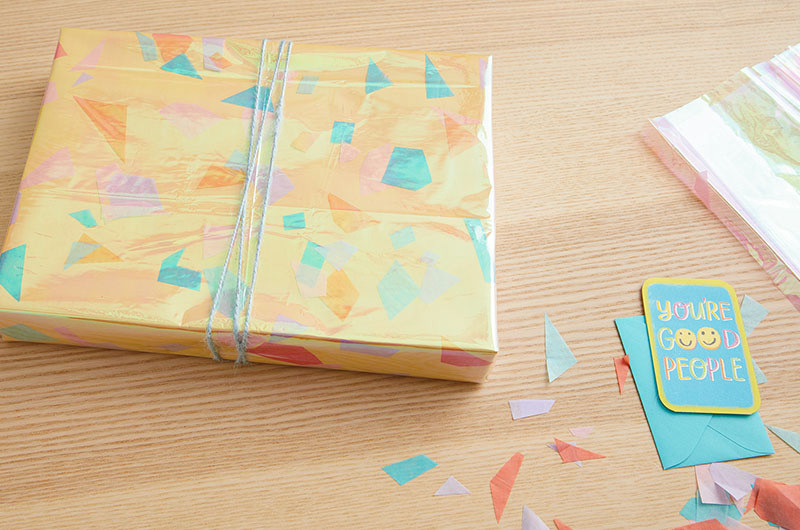
- Start with a gift wrapped in a solid colour paper. Make a little bit of tissue paper confetti in whatever sizes and shapes you prefer—just be sure they stand out against the wrapping paper.
- Cut a sheet of cellophane or iridescent cellophane wrap to fit the gift and spread it on a table.
- Sprinkle the confetti on the cellophane, keeping most of it in the centre.
- Centre the present top down on the cellophane and wrap it just as you did with the paper.
Add a tassel to the top of your gift or tie a tiny tassel garland on an unusually shaped present. Find out how to make your own tassels here—you can use anything from silky embroidery floss to super-chunky yarn. (And don’t be afraid to mix colours and textures.) Or make the easiest tassels ever out of tissue paper.
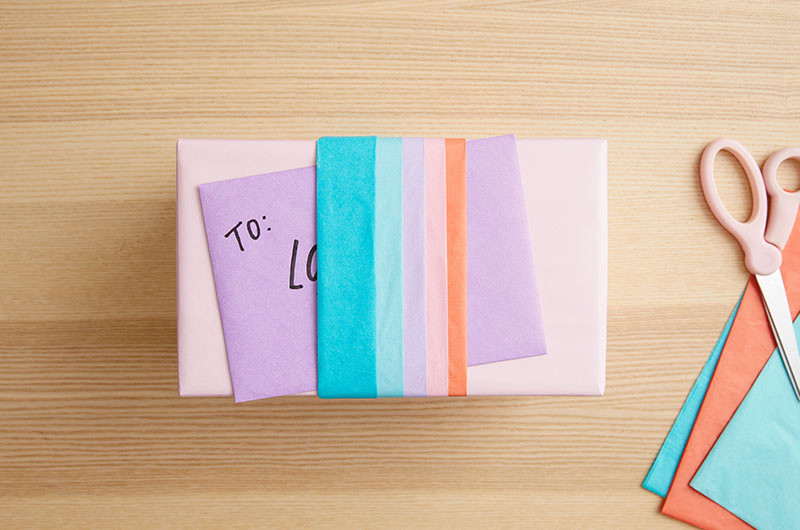
- Choose three (or more) colours of tissue paper: try rainbow colours, different shades of the same colour or three colours that match your wrapping paper.
- Cut strips long enough to go around your gift and about 3-5” wide (depending on the size of the box).
- Fold each strip in half lengthwise.
- Stack them on top of each other one at a time, letting about ½” inch of the folded edge of each colour show. Fold the cut edge of the last strip under to keep things tidy.
- Tape the ends of the stack to hold them together. Wrap the sash around the box and tape it down.
- Slide your card underneath the sash. If you’re afraid it’ll slip out, secure it with a little tape on the back.
- Want something a little more festive? Cut fringe in each layer for added texture.
Show off the other side of reversible wrap by cutting a strip to wrap around the gift. Take it a step further and layer multiple bands in decreasing widths.
For the neatest look, fold the cut edges of the wrap under. Finish it off with a ribbon and tuck the card underneath. (Secure the card with a little tape on the back if it wants to slide out.)
Stick a great big one in the middle of a box. Or hot glue different sizes and colours to cover the top of a gift. Or string some on baker’s twine to make a pom-pom garland to wrap around a gift—even if its awkwardly shaped. (Buy them by the bagful or DIY some with a pom-pom maker.)
Giving someone a stuffed animal, pillow, blanket, dish towels or scarf and want to skip the box? Use tissue paper and clear wrap and try the candy-style technique.
Whichever ideas you choose will have you feeling like a wrapping fashionista in no time.